Part 1: Introduction to Cat Pumpkin Carving
1. Introduction
Welcome to the enchanting and whimsical world of cat pumpkin carving! As the leaves turn golden and the air gets crisp, the anticipation for Halloween begins to build. One of the most cherished traditions of this spooky season is pumpkin carving. This art form has been around for centuries, originating from an Irish myth about “Stingy Jack” that led to the creation of the first Jack-o’-lanterns. But why settle for a simple face when you can carve something as adorable and iconic as a cat?
Cats and Halloween go hand-in-paw. From black cats being a symbol of superstition to the playful curiosity that cats embody, it’s no wonder that cat designs have become increasingly popular in the world of pumpkin carving. Whether you’re a novice looking to carve your first pumpkin or a seasoned pro aiming for a masterpiece, this guide is your one-stop-shop for all things related to cat pumpkin carving.
2. Importance of Choosing the Right Pumpkin
The first step in any pumpkin carving venture is selecting the perfect pumpkin. It’s not just about grabbing the first orange gourd you see; there are several factors to consider to ensure your carving goes off without a hitch.
- Size Considerations: The size of your pumpkin will dictate the complexity of your design. A medium to large pumpkin is generally ideal, offering a broad canvas for most cat designs.
- Shape Considerations: The shape of your pumpkin is equally important. A symmetrical pumpkin will make your design look balanced, while an asymmetrical one could add a quirky charm. Always check for bruises, soft spots, or mold, as these can affect the longevity of your carved pumpkin.
For more tips and inspiration on choosing the right pumpkin, don’t hesitate to check out these Creative Pumpkin Carving Ideas.
3. Tools You’ll Need
Before you dive into carving, it’s essential to gather all the necessary tools. A well-prepared carver is a successful carver, after all.
- Basic Carving Tools: At the very least, you’ll need a sharp knife for cutting, a scoop for gutting the pumpkin, and a marker for sketching your design.
- Advanced Tools: For those looking to create intricate designs, specialized carving kits are available. These kits often include tiny saws, drills, and scoops that allow for detailed work.
Safety should always be your top priority. Ensure that you’re familiar with the proper handling of each tool and that children are supervised at all times during the carving process.
Part 2: Step-by-Step Guide to Cat Pumpkin Carving
4. Safety Precautions
Before you make the first cut, it’s crucial to prioritize safety. Pumpkin carving involves sharp tools, and a momentary lapse in attention can lead to accidents.
- Proper Handling of Tools: Always cut away from yourself and keep your fingers clear of the blade. Use a stable surface to place your pumpkin while carving.
- Adult Supervision: If children are participating, make sure an adult is present to supervise. Kids can help with drawing the design or scooping out the insides but should leave the actual cutting to the adults.
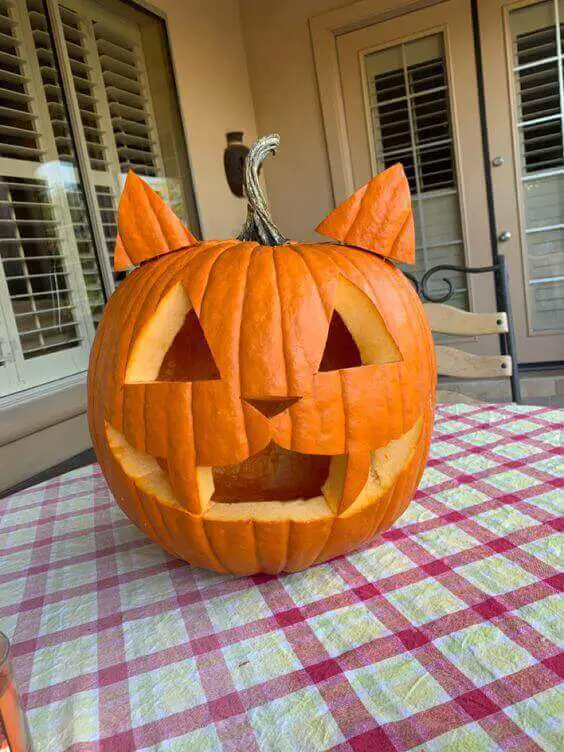
5. Types of Cat Designs
The next step is choosing your cat design. The design you pick will depend on your skill level and the amount of time you’re willing to invest.
- Simple Cat Faces: These are ideal for beginners or those looking for a quick carving project. Simple cat faces usually involve carving out the eyes, nose, and mouth.
- Full-body Cat Designs: These are more intricate and may feature a cat sitting, standing, or even in a playful pose. This type of design requires more time and skill but is well worth the effort.
- Fantasy Cat Designs: For those who want to go all out, consider fantasy designs like a Cheshire Cat or a cat witch flying on a broomstick.
For a variety of printable cat stencils, you can visit this Pinterest board.
6. Preparing Your Pumpkin
Before you start carving, your pumpkin needs to be prepared.
- Cleaning and Gutting: Cut off the top or bottom of the pumpkin and scoop out all the seeds and stringy pulp. The cleaner the inside, the easier it will be to carve.
- Sketching Your Design: Use a washable marker to draw your cat design on the pumpkin. This will serve as your guide during the carving process.
7. Simple Cat Face Carving
If you’ve opted for a simple cat face, here’s how to go about it:
- Cut out the Eyes: Use a small knife or carving tool to carefully cut along the lines you’ve drawn for the eyes.
- Carve the Nose: The nose is usually a small upside-down triangle. Be careful not to make it too large.
- Make the Mouth and Whiskers: These can be as simple or as intricate as you like. Some people even use a drill for ultra-fine whiskers.
8. Advanced Cat Design Carving
For those who have chosen an advanced cat design, the carving process will be more involved.
- Shading: This technique involves carving the pumpkin’s skin but not completely cutting through. It’s excellent for creating fur-like textures or intricate patterns.
- Texturing: Specialized tools can be used to scrape away the pumpkin’s flesh, creating different textures that make your cat design come to life.
9. Adding Extra Features
Once the basic carving is done, you can add extra features to make your cat pumpkin truly unique.
- Whiskers: These can be made using a thin carving tool or even toothpicks.
- Eyes and Nose: Some people like to use cloves, beads, or small LED lights to make the eyes and nose stand out.
10. Preserving Your Carved Pumpkin
After all your hard work, you’ll want to make sure your masterpiece lasts as long as possible.
- Preservation Techniques: Rubbing petroleum jelly on the cut areas can extend the life of your carving.
- Longevity: If possible, store your carved pumpkin in a cool, dry place when it’s not on display.
Part 3: Additional Tips and Tricks
11. Using Stencils
If you’re not confident in your freehand drawing skills, stencils can be a game-changer. They offer a foolproof way to transfer intricate designs onto your pumpkin, ensuring a professional-looking result.
- Benefits of Using Stencils: Stencils can make the carving process much more manageable, especially for complex designs. They are particularly useful for those who may not have steady hands or artistic skills.
- Where to Find Them: Stencils can be found in craft stores, downloaded from various websites, or even made at home. For free cat pumpkin carving patterns, check out this resource.
12. DIY Cat Stencils
If you’re feeling particularly creative, why not make your own cat stencil?
- Creating Your Own Designs: You can draw a design by hand or use graphic software like Photoshop or Illustrator. Once you’re happy with your design, print it out and transfer it onto your pumpkin.
- Freehand vs. Template: If you’re an experienced artist, you might prefer to draw your design directly onto the pumpkin. This method offers more freedom but also requires a steady hand and a good eye for detail.
13. Lighting Your Cat Pumpkin
The final touch to any pumpkin carving is the lighting. The type of light you choose can dramatically affect the appearance of your carved cat.
- Traditional Candles: These offer a warm, flickering light that adds a lot of atmospheres. However, they can be a fire hazard and should never be left unattended.
- LED Lights: These are a safer and more modern option. They last longer, offer various colors, and some even come with remote controls for different lighting effects.
14. Displaying Your Masterpiece
Once your cat pumpkin is carved and lit, it’s time to show it off!
- Indoor vs. Outdoor: Where you display your pumpkin will depend on various factors, including the weather and the safety of the location. Indoors, you can control the environment, but outdoor pumpkins can add a spooky touch to your yard.
- Creating a Halloween Scene: Consider adding other elements like fake spiders, cobwebs, or even other carved pumpkins to create a complete Halloween scene.
15. Troubleshooting Common Issues
Even with the best-laid plans, you might run into some issues during your carving project.
- Fixing Carving Mistakes: If you accidentally cut off a piece that was supposed to stay, don’t panic. You can often fix such mistakes by using toothpicks to reattach the piece.
- Dealing with Mold: Mold is a common problem with carved pumpkins, especially if they’re kept outdoors. To prevent mold, avoid leaving your pumpkin in damp conditions and consider applying a bleach solution to kill any existing mold spores.
Part 4: FAQs
16. FAQ: How long does a carved pumpkin last?
One of the most common questions people have is about the longevity of their carved pumpkin. Generally, a carved pumpkin can last up to a week if properly preserved. However, various factors can affect this, such as the type of pumpkin, the weather conditions, and how well it’s been preserved.
- Preservation Techniques: Using petroleum jelly or specialized pumpkin preservatives can extend the life of your carving. Some people also recommend spraying a mixture of bleach and water to prevent mold.
- Storage: If you’re not displaying your pumpkin, store it in a cool, dry place to prolong its life.
17. FAQ: Can I use a real candle inside my carved pumpkin?
Yes, you can use a real candle, but there are some safety considerations to keep in mind.
- Fire Hazard: Real candles pose a fire risk, especially if left unattended. Make sure to place your pumpkin on a non-flammable surface and keep it away from flammable objects.
- Ventilation: If you’re using a real candle, it’s essential to have proper ventilation to let the heat escape, or else the pumpkin could cook from the inside.
18. FAQ: Where can I find free cat pumpkin carving stencils?
Finding stencils for your cat pumpkin carving project is easier than you might think.
- Online Resources: Numerous websites offer free downloadable stencils. Just print them out and transfer the design onto your pumpkin.
- Craft Stores: Some craft stores offer stencil kits, especially around Halloween. These kits often come with various designs, including cats.
19. FAQ: Is pumpkin carving safe for kids?
Pumpkin carving can be a fun family activity, but safety should always be the top priority.
- Adult Supervision: Children should always be supervised when carving pumpkins. They can participate in the less dangerous tasks like scooping out the insides or drawing the design.
- Safety Tools: Consider using safety knives that are designed for kids. These are less sharp than regular knives but can still effectively carve a pumpkin.
20. FAQ: How do I prevent my carved pumpkin from molding?
Mold is a common issue that can ruin your carved pumpkin, but there are ways to prevent it.
- Bleach Solution: A diluted bleach solution can kill mold spores on the surface of the pumpkin. Simply spray it on the cut areas and let it dry.
- Proper Storage: Keeping your pumpkin in a cool, dry place can also help prevent mold. If you’re displaying it outside, bring it in during rainy weather.
Part 5: Conclusion and Additional Resources
21. Conclusion
Congratulations, you’ve made it to the end of this comprehensive guide on cat pumpkin carving! By now, you should be well-equipped with the knowledge, techniques, and tips to create your own feline-themed Halloween masterpiece. Whether you’re a beginner taking your first steps into the world of pumpkin carving or a seasoned pro looking for new challenges, this guide has something for everyone.
- Recap of Key Points: We’ve covered everything from selecting the perfect pumpkin and gathering the right tools to intricate carving techniques and preservation methods. We’ve also addressed common questions and provided additional tips to make your carving experience as smooth as possible.
- Encouragement to Try Carving: If you’ve never carved a pumpkin before, don’t be intimidated. The process is easier than it looks, especially if you follow the guidelines laid out in this guide. And remember, practice makes perfect. The more you carve, the better you’ll get.
22. Additional Resources
If you’re looking to further enhance your carving skills or find more intricate designs, there are plenty of additional resources available.
- Books and Tutorials: There are numerous books and online tutorials dedicated to the art of pumpkin carving. These often include step-by-step guides and templates for various designs, including cats.
- Online Communities: Websites and social media platforms often have communities where pumpkin carving enthusiasts share their creations, tips, and tricks. These can be great places to seek advice or find inspiration for your next project.
23. Acknowledgments
We’d like to extend our heartfelt thanks to everyone who contributed to this guide, from the experts who shared their knowledge to the readers like you who make all of this worthwhile.
- Thanking Readers: Your interest and enthusiasm for cat pumpkin carving are what inspire us to create comprehensive guides like this one. We hope you’ve found it useful and informative.
- Inviting Feedback: We’re always looking to improve, so if you have any suggestions, comments, or questions, please feel free to reach out. Your feedback is invaluable to us.
24. Related Articles
If you enjoyed this guide, you might also be interested in exploring other Halloween-related crafts and activities.
- Other Halloween Crafts: From making your own costumes to decorating your home, there are countless other ways to get into the Halloween spirit. Learn more about gluten free pumpkin muffins
- More Advanced Carving Techniques: If you’re looking to take your carving skills to the next level, look out for our upcoming articles on advanced techniques and unique designs. Check our guide for healthy muffins